How to write academic documents with GoogleDocs using F1000Workspace
| 31 July, 2019 | Leonardo Collado-Torres |
|
|

Leonardo Collado-Torres works at the Lieber Institute for Brain Development as a staff scientist in the Data Science team lead by Andrew Jaffe. The goals of this team are to better understand and characterise genomic signatures of the human brain. In this blog, he describes how he uses F1000Workspace to write his academic documents.
Recently, I’ve been working on one huge project which included a large manuscript with many supplementary figures and tables and is now published (DOI). This was a daunting task for me, but with the help of F1000Workspace, I’m pleased (and relieved) to say it’s finally been conquered! So now the dust has settled, I thought I would share with you my recommendations for how I used this incredible time-saving tool for writing and collaborating on academic documents shared via Google Docs.
I found out about F1000Workspace initially through an email from F1000Research which is a scientific journal from the same team. F1000Research has a gateway, which is like an open collection, for Bioconductor-related publications to which I and other researchers in my field have contributed to. You can learn more about this gateway and how to submit to it by clicking this link.
Why I use F1000Workspace
As a researcher, my job involves sharing our scientific results which we typically do in the form of research articles. Research projects are resource-intensive, so we also need to apply for funds through grant applications. Both of these activities involve writing and citing information that our peers have shared, which is where F1000Workspace comes into play as it helps me write these documents efficiently in a diverse team environment.
Prior to F1000Workspace, my team would have to share drafts of our manuscripts and grants in ways that would frequently lead to file conflicts. While other tools help mitigate the impact of file conflicts, ultimately using a cloud-based solution such as Google Documents or Overleaf simplifies this process. Overleaf is LaTeX based and thus more challenging to use than Google Docs. However, Google Docs is missing critical features for us, which are resolved by F1000Workspace. Ultimately, we typically need to submit Microsoft Word documents to journals and funding agencies. So, the fact that F1000Workspace works with MS Word is a crucial factor for myself and my team, in case we need to make a final edit to the references in the exported MS Word version.
For these reasons, I highly recommend F1000Workspace for writing documents with Google Docs. But first, you need to register for an account. You can sign up for F1000Workspace with a 30-day free trial today!
I’d advise that you check with your institution to see if they have a subscription as that way you can use F1000Workspace using your academic email. However, the trial I mentioned above, does allow for individuals to try out all the great features for one month and then you have the option to move to a paid account to maintain full functionality.
Start a project
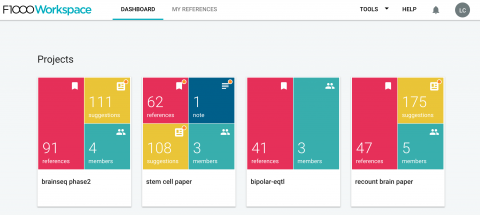
Once you have your account set up, start a shared project. I mean, private ones also work, but shared ones allow you to collaborate with others so that your team members can also update the citations in your document. For example, we have one called brainseq phase2.
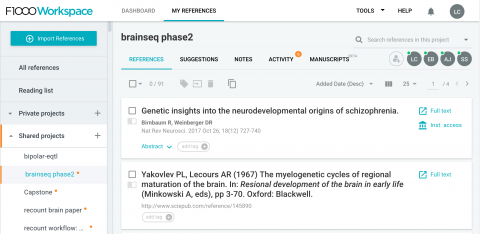
Once you open your project page, at the top left you’ll see a big blue button called Import References. Click on it.
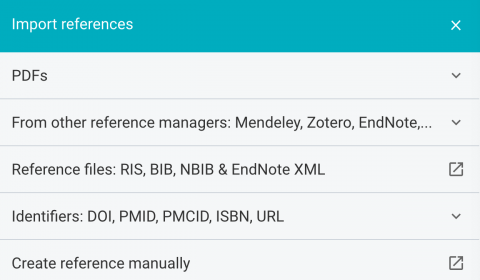
As you can see, F1000Workspace allows you to import references from many different sources. I typically import using identifiers, either a DOI or a PMID one. They also have a browser add-on that you can use to import references into your library when using websites such as PubMed.
Insert references into a Google Doc
On your Google Chrome browser, install the F1000Workspace Google Docs add-on available here. Next, open up your Google Doc and you’ll see that F1000 appears in your toolbar. If you click on it, the F1000 interface will open on the right sidebar.
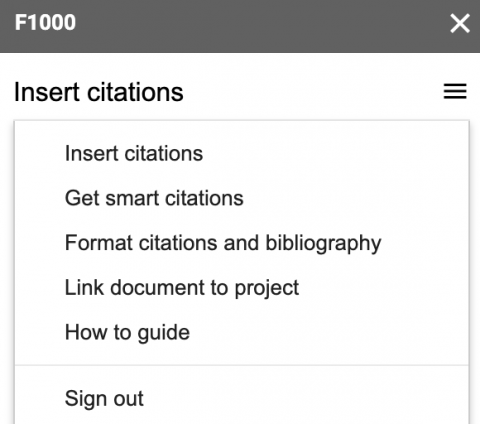
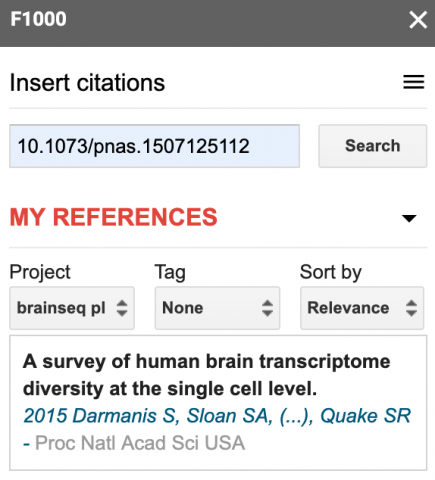
That interface lets you link your Google Doc to a particular F1000Workspace project, which I recommend doing. You can then go to Insert citations and start searching your project citations. I typically search by name or by the identifier, which is particularly useful if I just added the reference to the project via the identifier on a separate browser tab.
Update your document’s bibliography
Lets say that you’ve added a few citations in your document and now want to format them appropriately. In your Google Doc, click on F1000, then navigate to the Format citations and bibliography section.
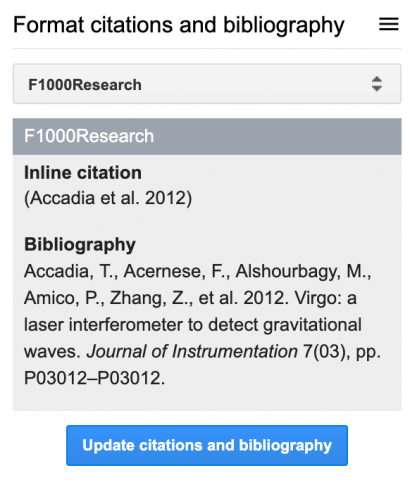
Before you click the big blue button that says Update citations and bibliography you’ll notice a dropdown menu that lets you choose your favourite citation style (or whichever the journal you want to send your manuscript requires).
The end!
Notes
And hey, did you know that F1000Workspace also works with Microsoft Word?
For more details, check the FAQs.
Automatic figure numbering
Now that we have figured out citations in Google Docs, lets learn how to cross reference figures, tables, equations, and whatever else you want. This is something that LaTeX users are familiar with but that you can’t do out of the box in Google Docs or Microsoft Word (as far as I know). Luckily others have made add-ons that solve this problem. The one I use, and so do other 11,197 people as of today, is Cross Reference available from the Google Chrome Store for free.
This add-on allows the user to label equations, figures and tables and refer to them within the text. It now also allows users to create labels for any element. These elements are numbered automatically and references are updated to match. If their order changes, references update to match. If one is removed, references to it are highlighted in red in the text. The text and style of references and labels can be customised.
Insert labels and references as hyperlinks. Instead of a URL, add a code recognised by Cross Reference, then an underscore, then your choice of name.
Configuration
Once you install Cross Reference, you’ll see it listed under the Add-ons menu in your Google Doc.

You’ll see all the different types of elements that you have configured with Cross Reference. Some come out of the box, like Figures.
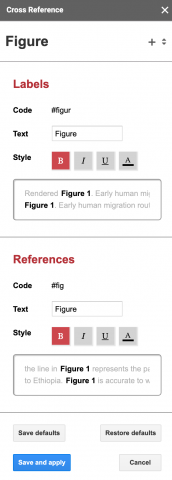
For every element you have to configure the following:
- The code you will use for the label, here
#figur. - The text that will be displayed before the number. In this case,
Figure(yes, there’s a space there). - The style of the label; bold here.
Then the same thing for the reference. In this case, the code for the reference is #fig. The codes have to be at least 3 characters long for the references and 5 characters long for the labels.
In my documents I typically add configurations for supplementary figures and tables using:
| Type | code: label | code: reference | Text |
|---|---|---|---|
| Supplementary Figure | #sfigu | #sfi | Figure S |
| Supplementary Table | #stabl | #sta | Table S |
| Supplementary File | #supfi | #sup | Supplementary File |
Usage
Now that you have configured Cross
Reference you can start using it. Let’s
say that I want to write the text We did
many things (Figure S1) where Figure
S1 links to my overview figure whose description starts Figure S1. Overview of my project. Since
we are talking about the overview figure, let’s
use _overview as the unique
identifier for this figure. As this is a supplementary figure, the label code
is #sfigu and the reference
code is #sfi. Meaning that
we must write the label code once in the figure description using #sfigu_overview and we can reference to
it as many times as we want using #sfi_overview.
The last tricky part is that you can write whatever you want, let’s
say hello, and then you need
to create a link (shortcut is cmd + k in macOS) with the correct code (either
the reference or the label one). So the text that you would write would be We did many things ([hello](#sfi_overview))
and later on when you describe the overview figure you need [whatever you want](#sfi_overview). Overview of my
project where here I’m using the Markdown syntax for links: [text](link).
Once you’ve inserted the links both for the reference and the label, you can
then go to Add-ons, navigate
to Cross Reference and click
Update document. Doing so
will change the text you had initially filed in for the correct text. So it
will look like this: We did many things
([Figure S1](#sfi_overview)) plus [Figure S1](#sfi_overview). Overview of my project.
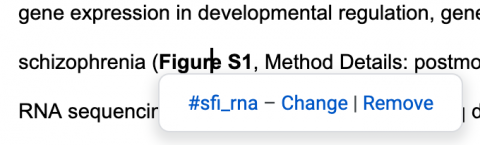
Here’s a real case example where my identifier for the first supplementary
figure is _rna, thus the
full reference code is #sfi_rna:
And you are done!
Notes
The number used for the item your reference depends on what order the reference codes are listed in the Google Doc. To check that the numbering order is correct (Table S1 appears in the text before Table S2, etc), I recommend opening your google document in two separate tabs. In one tab, you start reading your document from the top. If you encounter items out of order, then on tab two you can switch them around. That way you don’t have to scroll around and waste time, which is a more cumbersome problem as the document gets longer.
Overall, this process that takes a bit of time and can break due to a typo. So I highly recommend that you update your cross references as soon as you make a new one, so you can easily trace any typos and fix them easily. If you don’t, then it can become very hard to track down what went wrong.
Equations
Finally, let’s say that you want to insert equations. You can insert some equations with Google Docs, but you might want more fine control. If you use LaTeX I recommend the Auto-LaTeX Equations add-on available from the Google Chrome Store for free.
This add-on lets you automatically convert every LaTeX equation in your document into beautiful images! Simply enclose your math equations within …… and click the button in the sidebar, and all of your equations will be rendered in LaTeX!
It’s as simple as it sounds. What this add-on does is that it takes your LaTeX equation code, renders an image with the equation, and then inserts it back into your Google Doc. It also enables you to restore the LaTeX equation code so you can edit it if you find a typo.
Wrapping up
I hope that you’ll find this blog post/tutorial useful when writing your own academic documents. These tools have saved me so much time when writing academic documents in collaboration with others. I don’t want to imagine having to re-number all the references manually whenever we added each of the 48 supplementary figures, 17 supplementary tables, and 11 equations to the project we are about to complete.
Visit Leonardo’s website to learn more about his work and check out his other blogs posts.
To find out more about what F1000Workspace can do for you and how to sign up, visit our website.
|
|

User comments must be in English, comprehensible and relevant to the post under discussion. We reserve the right to remove any comments that we consider to be inappropriate, offensive or otherwise in breach of the User Comment Terms and Conditions. Commenters must not use a comment for personal attacks.
Click here to post comment and indicate that you accept the Commenting Terms and Conditions.